Ever since Andrew and I have been married, I have been trying to get rid of the lamp he had that ended up in our living room. Just not my style, I will put it that way :) Well, I have finally done it! Not without a little work though. I have been searching for a lamp for a long time to coordinate with the floor lamp we have that I love. While I found a base that was perfect (and on sale!), the shade was red...our color scheme is brown, orange, light blue, tan, etc. I was not discouraged though! Sure, I could have gone out and purchased a new shade, but it probably would have cost more than this little project. I had done some research in upholstering lamp shades, so I decided to go for it! Here is a little tutorial on how to do it. No matter what type of lamp shade you have, you can do it! The shade I used was actually a bit more difficult because it had a wire boning in it, so I could not adhere the new fabric to a large surface, I only had the top and bottom to work with. Regardless, I think it turned out pretty great, enjoy!
Here is the before:
Here is what you will need to get started:
-Iron
-Fabric scissors
-Fabric and coordinating finishing ribbon (I suggest purchasing this after you draw your pattern to save money on getting too much)
-Roll of tracing paper or wrapping paper works just fine
-Pencil
-Hot glue or fabric glue
Lets get started: (P.S. If you have a shade that is not currently covered, skip down to step 3)
1. Use an iron to remove the finishing ribbon. As you can see, it softens the glue so that it can be easily removed. It should pull off pretty easily, if not, run the iron over it a little longer.
2. Next, use your fabric scissors to very carefully cut along the seams of the outside fabric and remove. Do not cut the inside liner!!
3. Iron your fabric
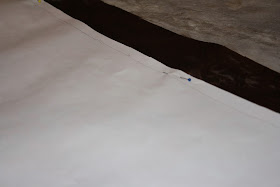
4. Make your pattern. Roll out your tracing/wrapping paper. If you are using wrapping paper, lay it pattern side down so you can use the white side to trace on. Lay your lamp shade on its side and place your pencil along either end (you will need to trace both ends so starting at the top or bottom does not matter). Roll your lamp along the paper and follow it with your pencil. Make sure you start at a distinctive point so you do not make your pattern too long. Do the same on the opposite end and draw straight lines to connect the top and bottom lines. Cut out the pattern with a half inch border, better to have too much fabric than not enough.5. Next, lay your pattern over your fabric and pin it all the way around. You do not want your fabric shifting or your pattern to move as you cut so pinning is crucial to making a perfect cut!
6. Now, start gluing! If you are covering a flat surface shade, it is easier to use a spray adhesive. Start on the lamp's natural seam and spray small sections of your fabric at a time and attach, making sure you smooth out wrinkles and pull it tight. If you are covering a lamp shade like mine with wire boning, you may want to grab a partner! My handy husband was kind enough to help me. Once you glue a seam (it is easiest to start on one of the wire boning pieces, it is a good anchor), start moving around the lamp laying down small increments of glue at a time on the top and bottom endge. I used hot glue, but you can also use fabric glue. As soon as the glue is down, have your partner pull the fabric tight and lay it over the glue. Press the fabric down so it has a nice, tight, professional look. Work your way around until you reach your original seam, trim the excess, fold the fabric under for a clean, finished look, then glue in place.
8. FINALLY! Step back and admire your work! This shade did not take me long at all and the end result is so much better than what I had. I got a custom shade for about $12, the fabric looks expensive, but I got it on sale, as well as the ribbon. I already had the hot glue, and other materials. Let me know what you think and I would love to see your refinished lamp shades!
I hope you enjoyed this blogging "How to". I love crafting and decorating, so it is always fun when I can merge the two! More "how to's" to come, I am going to be upholstering a head board soon so be on the look out!
-Carrie


looks great..i did mine yesterday...it wasnt as professional as yours i just kinda did it spur of the moment : ) but it still looks good
ReplyDelete